Saturday, December 22, 2007

Who's scared of a little raw egg?

Not me. "Testing" the dough (you know, to make sure it isn't poisonous before I bake it and feed it to my loved ones) is usually my favorite part of making cookies. And I will just say that the dough from these S'mores Cookies I made was the best cookie dough I have ever tasted. I really did not want to bake these cookies but instead eat it all with a spoon. But of course I couldn't do that (or could I??).

So where did I get this magic recipe for the best evah cookie dough? From a recipe exchange hosted by Katie from the WC board. Everyone who wanted to participate submitted a recipe to Katie who then randomly (you know, with respect to allergies, religious/dietary restrictions, etc) assigned the recipe to someone else. When I opened my email and saw this recipe I was happy...but come on, who wouldn't be happy with something called s'mores cookies? And without further ado, here is the recipe:

Smores Cookies
  • 1 Stick butter
  • 1 Stick margarine
  • 1 Cup packed brown sugar
  • 1/2 Cup sugar
  • 1/2 Teaspoon baking soda
  • 2 Eggs
  • 1 Teaspoon vanilla extract
  • 2 ½ Cups all-purpose flour
  • 1 Cup chocolate chunks
  • 1 Cup crumbled graham crackers (leave some chunks at least ½ inch in size)
  • 1 Cup mini marshmallows

Preheat oven to 375 degrees – use UNGreased cookie sheet or parchment paper.

In a large mixing bowl beat butter and margarine with mixer on medium-high speed for 30 seconds. Add brown sugar, white sugar and baking soda. Beat until mixture is combined, scrapping sides of bowl occasionally.

Beat in eggs and vanilla until combined. Beat in as much of the flour as you can with the mixer and stir in the rest. Fold in chocolate chunks, marshmallows and graham crackers.

Drop dough by rounded teaspoons 2-inches apart on cookie sheets. Bake at 375 for 8-10 minutes or until edges are slightly brown. Transfer to wire rack and let cool.

** With the chocolate, marshmallows and graham crackers you can use a little more or less to taste….

** you can also push in some marshmallows towards the end of baking so that they're still gooey fresh from the oven!

The verdict? These were good. Really good. Really good chocolate chip cookies. While I really liked them, they weren't what I was expecting. I guess I was imagining lots of marshmallows and graham crackers held together by a little bit of cookie...I hope that makes as much sense to you as it does in my head :)

If I made these again, I would definitely take the suggestions at the end to up the marshmallow and graham crackers. But even if I never want smores cookies, I think this is going to be my go-to recipe for chocolate chip cookies...the dough was that good ;)

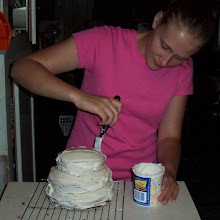
And the picture? Oh yeah, about that. I forgot to take one. And they are long gone now in my belly and the bellies of DH's coworkers. But here is a similar one ;)

photo from bettycrocker.com with a little "photoshopping" from me

Monday, October 22, 2007

Not so monster Monster Cookies

Anyone who knows me (should) know that I have a major sweet tooth - you might could call it an addiction because when there are sweets in the house, they are like crack to me. So when I found the blog Cookie Madness a few months ago I was hooked - a whole blog devoted to yummy desserts (not just cookies). What I especially like about this blog is that she doesn't just make fru fru desserts, but things that everyday people eat (and make) - that is the main appeal to me because I just can't do fru fru.

I can't tell you how many of her entries I have starred in my Google Reader to make, but this is the first one I have actually gotten around to making. Halloween Monster Cookies. When I needed to make a few cookies to bring to a friend, this seemed perfect because she has scaled the original recipe down to only make 8. But I made them smaller than called for, so that's why I called them "not so monster." I'm not going to post the original here because I didn't make any changes* and besides, you really should check out her awesome blog!

* Okay, I did make a couple changes. I made them smaller (as I already said) and used 1/3 cup regular M&M's. Plus I replaced the chocolate chips with a 1/3 cup candy corn to compensate for the lack of Halloweeness. But I don't really consider those changes.

Mini Apple Coffe Cakes

I had some apples that needed to be used pretty soon and wanted to make something yummy with them - more specifically I wanted to make this apple cake from MrsPresley's blog Good Eats and Sweet Treats, but when I opened my refrigerator, I was dismayed to find that I only had one stick of butter left to make a cake that called for 3 (yes 3) sticks. Oh, and I also only had one egg. So I had to scratch that idea. I also had to scratch any idea of making something that called for eggs because I needed that one egg to make cookies for a friend.

Enter my Dining on a Dime Cook Book. As a cook on a budget, I love this cookbook because it has tips to save money at the grocery store along with simple recipes that won't break the bank. In there is where I found a simple coffee cake recipe that had much fewer ingredients than I have seen in a recipe. I followed the recipe exactly except with the addition on chunks of apples. Oh, and the fact that mine was cooked in mini loaf pans in a toaster oven instead of an 8x8 pan in a real oven :) I changed the order of the directions slightly to make more sense.

Apple Coffee Cake
  • 2 cups flour (I used half whole wheat)
  • 2 tsp baking powder
  • 1 tsp salt
  • 3/4 cup sugar
  • 2 rounded Tbsp shortening
  • 1 cup milk
  • 1 medium diced Apple (I used Gala)
Preheat oven to 350. In a bowl, mix flour, baking powder, salt, sugar and shortening. Set aside 3/4 cup of the mixture for the topping. Add milk to remainder of flour mixture and mix until smooth. Pour batter into an 8x8 buttered pan.

  • 2 Tbsp butter, melted
  • 1/2 tsp cinnamon
  • 3 Tbsp brown sugar
Combine 3/4 cup of reserved flour mixture with above ingredients and sprinkle over the top of batter. Bake for 30 minutes.


This recipe filled two mini loaf pans and also made 4 muffins. These were really yummy and were had just the right amount of crumbliness (is that a word?) Despite the minimal list of ingredients, they packed a good flavor. Plus Justin said we could consider it healthy since they had whole wheat and fruit in them :)

Wednesday, September 19, 2007

Pizza Night

Every Friday night at my house is (homemade) pizza night. Period. So even with the oven out of commission, nothing was going to stop me from enjoying this (albeit new) tradition. But the task was not a difficult one, as a toaster oven is just a teeny, tiny, tabletop oven…right? Whatever the toppings, the crust is always the same. I found this recipe a few months back and absolutely love it. Made as it, it is crispy on the outside and chewy on the inside and rises to heights that put some chain pizza restaurants to shame. I say “made as is” because I no longer make it as is. I am real big on whole wheat, so I simply replace the all purpose flour with whole wheat. I started doing half and half, then slowly whittled the ratio down until I was brave enough to try it all whole wheat. This crust still is crispy on the outside and chewy on the inside, but it doesn’t rise as much and has a nutty flavor to it. But that is to be expected. I still love it, though (I love whole wheat), and will continue to make it this way. I've included three pizzas in this post, a calzone, southwestern chicken, and oreo. There are no recipes, just a description of what I did.


For the calzone, I rolled my balls of dough out, topped half with cheese and turkey pepperoni and put some green pepper on one side for Justin (because I could only cook one at a time and neither of us was waiting to eat), folded the empty side over, and crimped the two sides together. I dipped mine in pizza sauce while Justin ate his without.

The next weekend I decided to make a southwestern chicken pizza. I first took a chicken breast and cut it into bite size pieces. I then sprinkled them with a little cumin, chili powder, garlic powder, and red pepper flakes before grilling. For the sauce, I (not all the way) drained a can of black beans and put it in the food processor with the same spices. When it was to the sauce consistency I like, I spread a little over a prebaked crust (which I had sprinkled with a little garlic powder and red pepper flakes before baking). I topped with a little cheese, the chicken, then a little more cheese. I baked it for about 15 minutes on 400.

I'm sure by now everyone has seen the commercial for Domino's new Oreo Pizza. If you can get past the disgustin Oreo beards on the actors, you see nothing but a glorious crust filled with crushed Oreos. When I first saw it I thought "that's my kind of pizza!" So tonight, though I have never had one, I decided that was going to be our dessert to go with the chicken pizza. I prebaked that same white pizza dough (I know, I know I said I use whole wheat, but I didn't think the Oreos would taste very well on ww dough) and topped with cream cheese frosting. I then crushed about 10-15 oreos and piled them on the crust, after which I drizzled with a powdered sugar/milk glaze. I put it in the ove just to warm everything, since the crust was already baked, for about 8 minutes. It also gave the powdered sugar and the oreos a little chance to brown, so it was really yummy. I will definitely be making this again (though not on a reguar basis because look at the sugar on that!).

Thursday, September 13, 2007

Zucchini Chicken for one

I don't think I have ever had zucchini before (well, except in zucchini bread, but that doesn't count). But that didn't stop me from getting a big craving for it when I saw it in at the farmer's market. So of course I had to buy a big, beautiful one. It sat in my fridge a couple days before I actually figured out what I was going to do with it. I had seen this recipe on allrecipes.com awhile back, so I figured this would be easy enough for me to whip up on a weeknight. Below is the recipe how I made it. Keep in mind that I made just enough for me.

Zucchini Chicken
  • 1/2 cup buttermilk
  • 1/8 teaspoon pepper
  • 1/4 cup dry bread crumbs plus 2 tsp
  • 1 teaspoon parmesan cheese
  • 1 boneless, skinless chicken breast
  • 1/2 medium zucchini, sliced (I actually used three slices cut on a bias)
  • 1 slice of tomato
  • 2 tbsp shredded mozzarella cheese, divided

Mix 1/4 cup bread crumbs with pepper and parm cheese. Coat chicken in buttermilk, then breadcrumb mixture.

In skillet, brown chicken for 2-3 minutes on each side until golden brown. Saute zucchini slices until they begin to brown.

In a greased baking dish or pan, lay down zucchini slices down and sprinkle with leftover bread crumbs and tbsp of cheese. Layer tomato slice, then chicken. Bake at 400 for 25 minutes (I of course baked it in the toaster oven at 350 for about 30 minutes), then sprinkle with remaining cheese and cook for 10 minutes more to melt cheese.


I served this with brown rice mixed with little slices of sauteed zucchini.

The whole time I was putting this together I was talking to Justin on the phone, and I kept asking him if he liked zucchini. And if I like zucchini. And what did zucchini taste like. Turns out he's never had it either. Too bad he wasn't home to try it, because it was really good! I think I like zucchini now, but I can't really describe how it tasted in this. The chicken, though, was really moist and had a lot of flavor to not have a lot of ingredients. The only thing I didn't like was the tomato. But then again, I'm not very fond of tomatoes. But I will say that it added a nice sweetness to the dish that wasn't bad when eaten with both the zucchini and the chicken.

Tuesday, September 11, 2007

Salmon Patties

If I had to make a list of my all time favorite meals, this one would be right up there near the top. It is so simple, but I have always loved salmon patties! They are just so comforting. I would request it for my birthday dinner, when I came home from college, and it was even the meal I requested the first time Justin cooked for me.

Another reason I like salmon patties, atleast when it comes to me making them, is that they are so easy! And as we all know, I like easy meals!

Salmon Patties
  • 1 can pink salmon, drained
  • 1 egg
  • 1/4 cup milk
  • 1 cup cornmeal
  • 1/4 cup flour
  • salt & pepper to taste
Mix all ingredients together and form into 6 patties.
At this point I would normally pan fry in a little bit of oil, but this last time I just sprayed the pan with Pam and cooked them until golden brown without any extra oil. Each side took about 5-7 minutes.
I actually cooked half of the batter for me, then added a small chopped onion in the rest for Justin.


These must always be served with the same thing : macaroni and cheese and french style green beans. I served mac 'n cheese this time, but I never have canned vegetables, so I served it with steamed broccoli.

Wednesday, September 5, 2007

Sugar Rush

So I needed some sugar therapy this afternoon and wanted to bake something. Of course, I was too lazy to make anything difficult. So I decided on the easiest cookie I know - 3 ingredient peanut butter cookies. I have been making these since I was little and never make any other peanut butter recipe because they are so simple and tasty. But today I decided to change them up a bit - I made them in to chocolate chip peanut butter s'more cookies.

3 Ingredient Peanut Butter Cookies
  • 1 egg
  • 1 cup of sugar (I used brown because that is all I had)
  • 1 cup peanut butter

Mix ingredients together. I added in a handful of chocolate chips this time. Roll into balls, flatten slightly, and bake for 8 minutes at 350. Of course, in the toaster oven they take more like 14 minutes :)

Now for the s'more filling. I'm not exactly sure how much filling is needed for this recipe because it makes a small batch, so I am going to tell you how I normally make it for a normal batch (I usually do this with chocolate chip cookies). The directions might not be the clearest, but it is the easiest way I can think to explain.

S'more Filling

  • 1 jar of marshmallow fluff
  • 1 cup of powdered sugar, plus more

Mix marshmallow fluff with sugar, then dump out on counter sprinkled with powdered sugar. Knead in more sugar until you get a smooth consistency. Pinch off pieces and roll into balls, size is up to you, then sandwich between two cookies.

Let me just tell you - these were sweet. But so good! And since I ate it hot out of the oven, it was practically melting as I ate it. Yay for ooey gooey cookies! I made mine a little on the large size, so one was just enough for me. Oh - and you might want to try these with a large glass of milk to wash them down :)

Sunday, September 2, 2007

No stove? No problem.

Who needs a stove? I don't. When I decided I wanted tacos, I made tacos. Forget the stove top skillet. I have an electric griddle, and that is all I need.

The griddle actually worked reallly well to brown the meat. There is a well at the bottom that has a hole right in the center, so I was able to just tip the griddle, and all the fat went down to the well, in the little hole, and into the box underneath.


The I started wondering what I should do about the step where I add the seasonings and water to the pan? Then the lightbulb went off in my head and I decided that I should put the meat, seasonings, and water in a bowl with the water and microwave it. Let me just tell you it didn't work. So I just gave up and poured it back on the griddle. Luckily the griddle was still pretty hot so the water just cooked off pretty fast.

But regardless of the different cooking method, my tacos turned out fine. But then, how can you mess up tacos?
I don't use the little packets of seasonings, but rather the recipe Taco Seasoning I from allrecipes.com, minus the paprika and salt. I use half the amounts for a half pound of turkey.

Ugghhh...

So Friday morning I decide I am going to make french toast with cherry sauce. I put the cherries in a saucepan with a little water and wait for them to heat up while I gather everything else I need. A few minutes later I realize they pretty much still look the same (they were frozen, by the way) so give them a few more minutes. About ten minutes after I turned on the burner, I realize the cherries are not warm. At all. In fact, my burner is now ice cold from the cherries. We tried the fuses. Nothing. Everything else is still working. The next day my uncle came to check it out, and it seems the wall outlet the stove is plugged into isn't getting all the power it needs. So until we get an electrician out here, it is no stove/oven for me.

But for some strange reason it isn't bothering me. My mother, on the other hand, is worried to death that we're going to starve or something. Believe me, that isn't going to happen. I'm actually looking at it as a little adventure to see what all I can make on my array of small applinces.
So, what about the french toast you ask? I just baked my french toast in the toaster oven. Then came lunch later that day. But my plans for lunch were not hindered, as Rachael Ray's Rosemary Corn Cakes with Prosciutto and Chicken Sausages with Hot and Sweet Peppers do not require a stove. I simply used my toaster oven to cook the sausage (I use hot italian turkey sausage), which took about 15 minutes for two. And I used my electric griddle to cook the corn cakes and peppers (I just use green bell peppers by the way). The only problem I have with this recipe is that if you add all the milk, the batter is really runny. I would cut it back some, if not all, of it. I've actuallr forgotten the milk before when making it and it was fine.

Thursday, August 30, 2007

Tag you're it!

I've been tagged by Carrie, check out her blog! This means I share eight fun facts about myself and then tag eight other bloggers.

Let's see...

1. I cheered from 8th-12th grade and was extremely, annoyingly peppy. My friends even named a move after me to pick on my overzealousness - "The Marishannon." It was requested quite often...

2. I can only drink ice cold water, anything else makes me want to hurl (just what you want to hear on a food blog huh).

3. My favorite color is pink but my favorite color to wear is blue.

4. I used to have a cat named Tiger (but I renamed it Simba after I saw the Lion King but denied the reason why when my sister accused me of copying the movie). I would put the cat in a high chair, feed it out of a baby spoon, ride it around in a stroller, and swing with it in my shirt pocket. It did all these things and more willingly. I miss my kitty...

5. I disliked Justin until about 3 years ago. Why you ask? Because in elementary and middle school there was a program called ACCENT for the "smart" kids and we were the only two kids from our grade in it (well in 3rd and 4th grade anyway). And I wanted to be the only one. He used to tell me he only got in by one point to make me feel better. But yes...I held a grudge since I was about 8 years old :)

6. I am scared of large dogs...and medium sized dogs...and yappy dogs...and strange dogs...and most dogs (except for my sister's overgrown 90 lb boxer/great dane)

7. I sleep with the light on most of the time when I am by myself - I am a big scaredy cat.

8. I am going to New York in January. It will be my first time on an airplane. I am not scared by the actual flight - I am scared by the thought of finding the right terminal, getting there on time, having what I need, and losing my luggage. Actually, I am not scared of losing my luggage. Just finding it.

So those are the "fun facts" I could think of. I am tagging:
1. Sarah
2.Jen
3. Jen
4. Erika
5.Brooke
6. Julia
7. bakingblonde
8. Linda

Monday, August 20, 2007

It tastes better than it looks...

I swear! The "it" I'm referring to is black bean smash. I first made this Rachael Ray recipe a few months ago, and we loved it so much I make it all the time. I also make it because it is simple. And I love simple things. How I make it is really just based on her recipe. Below is how I make it.


Black Bean Smash


  • 1 can of black beans, drained and rinsed
  • 1/2 large or 1 small white onion, chopped
  • 3 or 4 cloves garlic, chopped
  • 1 tbsp evoo
  • 2 tsp cumin
  • 2 tsp chili powder
  • pinch of kosher salt
  • chicken broth (optional)
Heat evoo in pan over medium heat. Saute onions until translucent. Add garlic and cook a minute more.

Add half can of black beans to the pan, combine with onions and garlic, and smash with back of fork or potato masher.

Add rest of beans, along with seasonings. Mix well and heat. This last time I made them I kept adding a chicken broth a little at a time (tbsp or so) so they wouldn't dry out as I finished dinner. I liked the end result.


I served the black beans with Cilantro Turkey Burgers from Cooking Light. Yes I served the burgers with the black beans, not the other way around, because I am in love with black beans and they are the best part to me. I love how these burgers taste and they are very juicy. I make them just like the recipe, only I don't serve them with the ketchup; Justin doesn't want to try it. We just melt monterey jack cheese over it and serve it on nicely toasted buns.

I also made roasted red potatoes to go with the burgers. Just chop the potatoes into chuncks, toss with evoo and some sort of seasoning, and roast at 400 for 20-30 minutes. This time I sprinkled them with cumin and chili powder.

leftovers anyone?

Perhaps I don't fill my shells as much as most people, or perhaps I just made a lot of filling, but either way, I had filling leftover from stuffed shells that I neede d to use up. So of course, I headed over to the What's Cooking board and asked them. Having no idea what to do with it (and having no shells left), a nestie by the name of branny suggested I make a quiche out of it. Brilliant. Of course, quiche is one of those things that I have never had before and so I didn't even know if I liked it, but I figured why not.
I had about 1 1/2 cups of filling left, so I mixed it with 4 eggs. I then poured that into a pie shell (Pillsbury - I needed a quick weeknight meal) and sprinkled with red pepper flakes, a little salt and pepper, and a little bit of parm cheese. I baked it at 350 for 30 minutes. I don't know if you're "supposed" to do that with the edge of the crust, but I didn't like having a bunch of bare crust sticking up at the top so I turned it over.
So this was good, but not great. It was too eggy and dense to me. Perhaps I should have added a little milk? But it was a great use of leftovers and I would probably do it again if I had leftover filling. It was also much better the next day after it had sat in the fridge all night.

Stuffed Shells

The last time I made chicken stuffed shells I just wasn't too impressed with it. Justin really liked it, but to me it was just dry and plain tasting. But I decided I wanted stuffed shells again, so last week I whipped some up with my new favorite vegetable - spinach (this was why Justin said "no more spinach"). All measurements are definitely approximate :)

Spinach & Chicken Stuffed Shells
  • 15 jumbo shells, cooked according to directions and drained
  • 2 chicken breasts (mine were about 4-5 oz each) boiled and shredded
  • 7 1/2 oz ricotta cheese
  • 4 oz frozen spinach, thawed and drained
  • 2 tsp garlic powder
  • couple shakes of red pepper flakes
  • 1 tsp italian seasoning
  • 1/3 cup mozzarella cheese
  • 1/4 cup parmesean cheese
  • salt and pepper to taste
  • 2 cups marinara sauce (that's about what I had left, you can use more if you have it)

Heat oven to 400 and spray baking dish with cooking spray.

Mix together all ingredients from shredded chicken to salt and pepper.

Spread 1/2 cup sauce on bottom of baking dish.

Fill cooked shells with chicken mixture and place filled side up in baking dish. Pour rest of sauce over shells. Sprinkle extra cheese on if desired.

Cover with foil and bake for 15-20 minutes, removing foil last 5 minutes.


P.S. I really liked the flavor these had and will keep making them this way.
P.P.S. The original recipe I used for stuffed shells can be found on Amber's blog; that recipe is how I learned how to make stuffed shells.

Sunday, August 19, 2007

Baked french toast???

I've been wanting to make bread pudding for a few months now. Not that I had any idea what it tasted like or if I would even like it. I tried to find a recipe, but I couldn't find anything that appealed to me. So I hopped on The Nest and asked the girls on the What's Cooking? board if anyone had a recipe. Carrie from Carrie's Cooking Adventure came to my rescue with a link to the bread pudding she had made.


The only changes I made was use wheat bread (that makes it healthy, right?), only 3 eggs, and I ommited 1/4 cup of sugar. My vanilla sauce was very runny, but I wasn't sure if that was how it was supposed to be or not. I poured sauce over the pudding but ended up pouring some of it out because it was drowning the bread. But it still imparted the flavor.


I liked this recipe. When I was mixing everything together I realized that this was kinda like baked french toast, so I figured I had to like it. I don't know how "authentic" this recipe was, but it was a great start for someone who has ever even tasted bread pudding (and also for someone who didn't have a lot of ingredients in the house). I also love how puffy it was when I took it out of the oven. It looked so yummy. The only change I would make to this recipe is to omit the raisins, which are optional anyway, because I just didn't like how they tasted burnt after being baked on top of the bread. And this is coming from someone who loves raisins.

Teeny Tiny Comfort

I don't like even like meatloaf. Most people think of it as real comfort food, but I don't like the thought of eating a big hunk of meat. That's probably why I didn't eat hamburgers for over 10 years. But despite my loath, every now and then I crave meatloaf. Don't ask. So this last time my craving hit, I went looking for something a little different than my usual egg/oatmeal/meat/ketchup/blah/blah/blah. And Italian Style Meatloaf I on allrecipes.com was what I found. I thirded (is that the right word) the recipe since I just wanted to make enough for Justin and me to have one serving for dinner. Below is how I made it.

Italian Style Meatloaf
  • 1/2 pound ground turkey
  • 2/3 eggs, beaten
  • 1/4 cup dry bread crumbs
  • 1 tablespoon and 1 teaspoon ketchup plus more for top
  • 1/4 teaspoon Italian-style seasoning
  • 1/4 teaspoon dried oregano
  • 1/4 teaspoon dried basil
  • 1/4 teaspoon garlic salt
  • 1 medium tomato, diced
  • 1/2 cup shredded mozzarella cheese
  • 1 tbsp parmesean cheese

Preheat oven to 350.

Mix all ingredients together in a bowl. Press into two mini loaf pans or shape into two loaf shapes on a baking sheet. Spread extra ketchup on top.

Bake for 30 minutes.

(have I mentioned I love my teeny tiny loaf pans)

So I really liked this meatloaf. It was bursting with flavor and was anything but just a big hunk of meat. I'm glad that I replaced the canned tomatoes with fresh. Justin also really liked this meatloaf, and he hates meatloaf more than I do, and said he would love to have this again.

To go along with the meatloaf I sauteed some green beans. I would like to tell you how much...but I have no clue. Let's just say it was enough for us.

This is how I did it. I originally got these instructions from this recipe on Recipezaar.com. I do different seasonings depending on what I am making, but sauteeing is my favorite way to prepare green beans.

  • Bring a large sauté pan of water to a rapid boil and add the beans.
  • Simmer until crisp-tender, about 3 minutes.
  • Drain well and return to the saucepan.
  • Lightly coat with evoo and italian seasoning.
  • Sauté, tossing frequently, for about 1 minute more. (I actually do this until a few sides get brown and crispy)
  • Serve at once.

So I wanted to serve this meal with some yummy garlic mashed potatoes (this is supposed to be comfort food right?), but Justin had other plans.

See that yellow blob on the plate? That's right. We had the blue box: Kraft Macaroni and Cheese. Justin wanted mac 'n cheese, but he didn't want homemade mac 'n cheese. Now there is nothing wrong with the blue box. It's just that I prefer to eat homemade and I am really trying to limit the chemicals we take in from our food. And chemicals this has. When I opened up the powder packet to add to the noodles I was taken back by the unnatural orange color of the "cheese" (that I should have gotten a picture of). The things we do for those we love...

But, alas, I must admit I enjoyed my meal, all of it.

Saturday, August 18, 2007

Sounds tropical

Being stuck with a large black plantain and half a can of coconut milk from dinner one night, I sat down to think of what I could make. It isn't hard to make a dish with those two ingredients, but nothing I found when I did a search looked appetizing to me at the moment. So I thought (this next part is very scholarly), plaintains....bananas. Bananas....banana muffins! I decided I wanted to make plantain muffins and add in the coconut milk somehow. This was sounding very yummy to me already. So I went to my mom's house to get her banana muffin recipe, the one I grew up on and the only one I will ever make. I pretty much just stuck with the recipe, except subbing plantains for the bananas, coconut extract for some of the vanilla, and half of the butter for coconut milk.

Coconut Plaintain Muffins
  • 2 large eggs

  • 1/4 cup softened butter

  • 1/4 cup coconut milk

  • ½ tsp salt

  • ½ tsp vanilla extract

  • ½ tsp coconut extract

  • 1 large black plantain

  • 1 tsp baking soda

  • 1 cup sugar

  • 1 ½ cup white flour

The steps to this banana muffin recipe are another reason I love it so much!

Step 1: Mix everything together (you don't even have to mash the plantain first if you don't want to).


Step 2: Pour into 12 prepared muffin tins and bake at 350 for 45 minutes.

Step 3: Enjoy :)


P.S. These were better than regular ol' banana bread anyday!


We'll call this my pear phase

I go through phases with my food, especially with fruit. Let's say I really like oranges. For the next few weeks I will buy and eat nothing but oranges. Then I will get so sick of them that I won't even want to look at oranges for weeks! Then I will slowly lose my disgust and will incorporate oranges back into a normal part of my diet. Or start the vivious cycle over again...

A few months back my food of choice for my phase was the lovely pear. There is nothing I love more than a ripe, juicy pear. And at one point I might as well have been single handedly supporting all the pear farmers in America.

When I started to lose my interest in pears, I realized that I had so many and I needed to use them up. So I went to allrecipes.com and typed in "pear." One thing that caught my eye was pear bread. I had never heard of that. Banana bread I had eaten, zucchini bread I have eaten, but no pear bread. So I went with what looked like a good recipe, Pear Bread I. Click the title for the original recipe, below is the recipe with a couple changes. I normally don't like to make changes the first time I make a recipe (mainly because I don't like reviewers who change the recipe around and then give it a bad rating) but I figured my changes didn't change it too much (plus I wasn't reviewing it on the website).

Pear Bread
  • 3 cups all-purpose flour
  • 1/4 tsp baking powder
  • 1 tsp salt
  • 1 tblsp ground cinnamon
  • 3/4 cup applesauce
  • 3 eggs
  • 1 1/2 cups white sugar
  • 2 cups peeled shredded pears (I used two large pears)
  • 2 teaspoons vanilla extract
  • dash of nutmeg (still not sure why I did that...)

In a large mixing bowl combine flour, baking powder, baking soda, salt, nutmeg, and cinnamon. Make a well in the center of the bowl.

In a separate bowl combine the oil, eggs, sugar, grated pears, and vanilla. Blend well. Add to well of dry ingredients. Stir until just moistened.

Spoon batter into 2 greased and floured 8x5x3 inch loaf pans. (I actually used one loaf pan, unsure of the exact size, and two mini loaf pans)
Bake in a preheated 325 degree F (165 degrees C) oven for one hour and 15 minutes. Cool on wire rack before removing from the loaf pans. (time varies, watch closely after about an hour)

I really liked this bread. Many reviewers thought this was too "cakey," but to me it was perfect and better than I expected. It was moist with just the right amount of sweetness. Overall the pear taste was very subtle, but every now and again I would bite into a shredded piece of pear and get a burst of flavor.

Is it ready yet?

Flipping through the March '07 issue of Cooking Light I saw what looked like one of the most delicious cakes: Italian Cream Cake. It just looked like this wonderfully moist two layer cake full of chopped pecans and covered in cream cheese icing. Now I normally don't like pecans, but I had to try this cake. Plus it got a four out of five star rating by reviewers on the website, so I figured it must be pretty good. So I beat my egg whites, folded in my sifted cake flour, and toasted my teeny chopped pecans. I imagined it to be a moist, cakey version of an angel food cake with pecans...This cake should been moist, the reviewers said it would be, but mine wasn't. But that was probably my fault. See, I checked the cake when at the appropriate time, but it just didn't seem done. So I left it in there. Every minute or so I would check it, and it just didn't seem done. Finally after about 10 minutes I gave up and took it out. By then I could tell it was overdone.

After it cooled I frosted it with the homemade cream cheese frosting. I should have taken the advice of the reviewers and used another cream cheese frosting, but I am stubborn and must go by the book the first time. The icing tasted alright, very cream cheesy and sugary, but it lacked something. It was also very thick and there just wasn't enough of it. I was able to cover the entire cake, but I really had to skimp on the inside between the two layers.
All in all the cake was good. But then again, not many cakes are bad in my opinion. I would probably make this again, but do 1 1/2 times the amount of icing (or use another frosting recipe) and pull the cake out of the oven even if I don't think it is ready...

No more spinach...

Growing up I loved watching Popeye the Sailor and had a videotape of a few different Popeye cartoons that I would watch over and over. But however many times I saw him squeeze open that can of spinach and swallow it in one big gulp, I could not be convinced that spinach was something to be enjoyed. So growing up I never ate spinach.

In fact, I never had spinach (unless I'm suppressing some horrible memory) until about 5 months ago when my mom brought over a salad to dinner one day that had baby spinach in it. And I liked it. From then on I was hooked; in salads, sauteed as a side dish, stuffed into meat, and the list goes on and on. Spinach is a very versatile vegetable.

The first thing I ever made with spinach was stuffed chicken. And Thursday night, that's how I prepared my leafy green vegetable. Last time I had made spinach stuffed chicken, the filling had ricotta cheese in it. I had also thought about mixing it with feta cheese, but since I was already making au gratin potatoes, I didn't want to have cheese in the chicken, too. So I went with something simple, as usual, and put together what seemed right to me.


Spinach Stuffed Chicken
  • 4 oz frozen spinach, thawed and drained
  • 3 oz plain yogurt
  • 1 tsp garlic powder (approximately)
  • dash of ground nutmeg
  • salt and pepper to taste
  • 2 boneless/skinless chicken breasts (mine were about 4-5 oz each)

Preheat oven to 375.

Mix together first five ingredients.

Put each piece of chicken between sheets of plastic wrap and pound until 1/4" thick. Justin actually does this step for me and uses a small cast iron skillet.

Divide mixture evenly between pieces of chicken, spreading evenly over entire breast. Roll each piece up, jelly-roll style, and place seam side down in a baking dish and place in the oven for 45 minutes.

I told you it was simple. Despite the minimal ingredients, this chicken was great and the filling would be a great base to add more yummy things to. The only thing Justin told me about this chicken, other than it was really good, was that this was the last time we were having spinach for awhile. That was the third night in a row that dinner had consisted of chicken and spinach, and he does not want to get kidney stones. Now this knowledge of spinach causing kidney stones does not come from any medical background, but from an episode of Reba where Brock gets kidney stones from eating too much spinach. Of course, spinach does contain large amounts of oxalate which reduce the body's ability to absorb calcium and can lead to kidney stones. Blah, blah, blah...

It tastes like fried cheese

A few weeks ago I had seen a recipe for au gratin potatoes on Ally's blog Culinary Infatuation. Never having had au gratin potatoes before, I wasn't even sure what au gratin potatoes were. My only experience with them had been seeing the boxed kind on the grocery store shelf.

And to be perfectly honest, potatoes that come from a box or bag scare me a little. They have an awful taste and an even worst texture. The few times my mom made mashed potatoes from a box growing up I refused to eat them. I can tell the difference no matter what you do to them. I need real potatos full of starchy goodness. And when I saw this recipe I knew that I had to have them. I mean, who can go wrong with cheese and potatoes (fresh potatoes that is)?

So tonight was the night to make them. The only thing change I made to the original recipe was to use two giant red potatoes instead of three medium Yukon golds and only making two layers of the potatoes and sauce because, well, that seemed enough to me; I had also cut my potatoes a little thicker than I should have. I also used already ground nutmeg instead of freshly grated. I almost omitted the nutmeg altogether, but I'm glad I left it in because it added a nice, nutty undertone to the dish that I really like (I really sound like I know what I'm talking about, don't I).
I was happy with how this turned out and will be making it again. Justin really liked it, too, and went back for seconds. He especially liked how the cheese got crispy on the edges (I will admit that was the best part) and decided that it made the dish taste like fried cheese!

Friday, August 17, 2007

I caved...

As much as I tried to fight it, I did it. I started a food blog. I have been taking pictures of my food for months now with every intention of starting a blog. But I have been too scared and intimidated by the amazing blogs that I frequent, especially the ones by the talented ladies on the What's Cooking? board on The Nest.

So I have conquered my fear and given into my urges. But this will be good for me. I often forget what foods I cooked that Justin, my not-so-picky husband, and I liked, so I will now have a place to keep track of all my hits and misses. I am also hoping to give encouragement to new cooks and share a few yummy recipes with others (oh please, somebody, like my food...)

I am by no means a gourmet chef. I am learning. I have always been a picky eater growing up and I am trying to (slowly) change that. Despite my lack of a vast foodie knowledge, I enjoy cooking. And more importantly - I enjoy eating!

(Oh, and those pictures I've been taking? Those will be my posts for awhile!)